VPS, CPANEL/WHM install

I have successfully in stall OSSN from a clean vps. Installed CPANEL (Was a bit of a challenge). You will need to be wise on DNS. If there is anyone that would like assistance with this type of install, I would be happy to assist. Thank you to support for the pointers

Hey Michael
I managed to get smtp service to work on WHM using reverse dns on the hosting side. After 24 hrs the PTR records promolgated and I was suprised by an all go in the cpanel user. There is alot of DNS settings to consider in the setup if you want to run the Mail server locally. I am happy to assist if you can tell me where the issue lies? I am also learning as we go along. Take care

Many thanks for making this available, Mark.
Perhaps you can share some more information which way you configured the mail services?
Mick Dawlings might be interested in that.
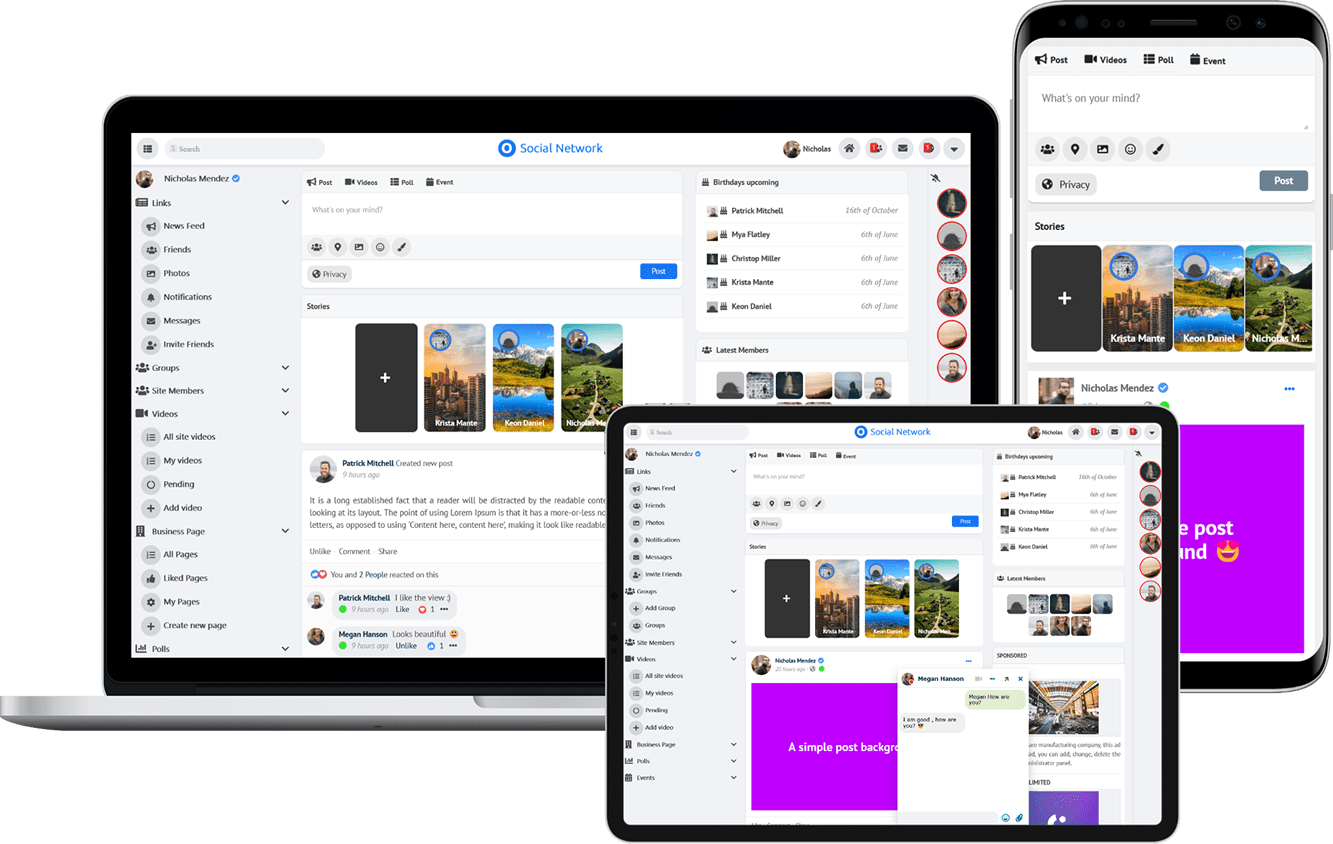
OSSN On Cpanel Self Host On VPS Server Production environment
This is a step by step instruction of the process that I took to install OSSN on a CPANEL environment using Ubuntu 20.04.
Prerequisites:
- Root access to a VPN Server
- Fresh install of Ubuntu Server 20.04. Do not install anything on it, this will avoid problems with compatibilities with CPANEL
- Licence for CPANEL/WHM.
- Registered Domain Name. I would recomment that you register the domain with the same host that provides your VPS. Hosts do not like it if you change the primary nameservers.
Instructions:
SSH into your VPS
Disable firewall
iptables-save > ~/firewall.rules
systemctl stop ufw.service
systemctl disable ufw.service
Install CPANEL with following command.
cd /home && curl -o latest -L https://securedownloads.cpanel.net/latest && sh latest
After watching the beautiful way the guys at CPANEL have coded thier installation script! EVERYTHING that is needed for CPANEL to run is installed and we are up and running. If you got errors its probably because you didnt have a fresh install of ubuntu 20.04 or there is something installed on it.
Enable Firewall and allow ports
ufw enable
ufw allow 22
ufw allow 2087
In the SSH console, scroll up to the green line:
Congratulations! Your installation of cPanel & WHM 11.114 is now complete. The next step is to configure your server.
Follow the one time auto login url to start the configuration of CPANEL using your browser.
Confirm the Legal Stuff and continue.
Enter your email address on the next page. You will need custom nameservers for your domain. You can enter:
ns1.yourdomain.com
ns2.yourdomain.com
Click next.
We need to configure our nameservers so that they can resolve addresses.
Go to Server Configuration, Basic Webhost Manager Setup.
Click on Basic Config tab
Ensure your VPS server's ip address is entered in the first box
Scroll down to Nameservers and ensure that only your custom nameservers are entered.
Click on Configure Address Records for each of them and enter your VPS IP and click Configure Address Records
Close and Click on Save Changes
Now we need to set our host name
Go to
Home /Networking Setup /Change Hostname
Enter a hostname that you want in this form example.yourdomain.com Example being the name of your host server.
Click Change
Click Add A Record at the bottom
Go to:
Home/DNS Functions/Delete a DNS Zone
Delete the entry that does not have yourdomain.com eg normally has a rapid.com entry
Go to:
Home/DNS Functions/Perform a DNS Cleanup
Click proceed
Go to:
Home/Account Functions/Create a New Account
Enter login information and your domain name
Click Create
Click Go to Cpanel at top of page
In Cpanel on the right click on SSL warning button
Click to select all entries then click Run auto ssl
Download the OSSN installer zip file from https://www.opensource-socialnetwork.org/download
At the CPANEL main page click on File Manager
In File Manager click on public_html in the panel on the left.
Click upload
Select the OSSN zip file you downloaded
Right click on the file and extract
Open new folder that was created and click select all then click move
Change path to only be /public_html
Go one folder up
Delete folder that was created in the extract
Delete original zip file uploaded
Back in Cpanel click on mysql database wizard (The info you enter here you will need later on)
Enter a name for database Click next
Enter a name for user and password click Next Step
Select all priviledges
OSSN needs a special folder to store uploaded files including profile icons and photos. You will need to create this directory.
For security reasons, this folder MUST be stored outside of your document root. If you created it under /www/ or /public_html/, you’re
doing it wrong. Once this folder has been created, you’ll need to make sure the web server OSSN is running on has permission to write to and create directories in it.
To find the user, in ssh terminal
ps aux | egrep '(apache|httpd)'
You will see this result the user is nobody
root 61540 0.0 0.2 67684 18924 ? Ss 11:10 0:00 /usr/s
root 62926 0.0 0.0 5928 1652 ? S 11:27
root 62927 0.0 0.0 5928 1656 ? S 11:27 0:00 /usr/local/cpanel/bin/splitlomain=go
nobody 62929 0.0 0.1 69032 11436 ? S 11:27 0:00 /usr/sbin/httpd -k start
nobody 62930 0.0 0.1 69024 11296 ? S 11:27 0:00 /usr/sbin/httpd -k start
nobody 62931 0.0 0.1 69024 11416 ? S 11:27 0:00 /usr/sbin/httpd -k start
nobody 62932 0.0 0.1 69040 11628 ? S 11:27 0:00 /usr/sbin/httpd -k start
nobody 62933 0.0 0.1 69032 11540 ? S 11:27 0:00 /usr/sbin/httpd -k start
nobody 62975 0.0 0.1 69024 11644 ? S 11:29 0:00 /usr/sbin/httpd -k start
nobody 62978 0.0 0.1 69032 10680 ? S 11:29 0:00 /usr/sbin/httpd -k start
nobody 62979 0.0 0.1 69036 11372 ? S 11:29 0:00 /usr/sbin/httpd -k start
run command in ssh replace nobody if your webserver user is different
sudo chown -R nobody /home/wpuser/ossn_data
In browser go to https://server ip address:2087/
Login with root
go to Home/Software/EasyApache 4
In Currently Installed Packages click on Customize
Click on PHP Extensions
Click on Page Size and select All
Enable php81-php-ioncube13, php82-php-fileinfo, php82-php-exif
Click next
Click Provision
In browser go to https://yourdomain.com to install ossn
If you have errors there is a step missed.
Click next
Click next
Enter the database information you set earlier in the dialogue boxes
On next page enter an admin user
OSSN is now installed

Glad that you made it work, its simple that you need to follow instructions and DNS (NS) plays important role so your cpanel manages your DNS.
Due to the many requests in the past for additonal features and components we have decided to develope a premium version. Features like Hashtags, Videos, Polls, Events, Stories, Link Preview, etc included in it.
 $199 (Life Time)
Learn More